


 When thinking of food preservation, many people have visions of some big-production, time-consuming project with dozens of jars to fill with pounds and pounds of produce. But that doesn’t have to be the case.
 The first thing most people say to me, after expressing a desire to learn to ferment or preserve something, is, “But I don’t have enough space in my apartment for a big crock!” Or, if we are talking about preserving fruits, vegetables, jams or jellies in mason jars, they will say they “don’t have a big enough pantry to store all of those jars.”
I never said you had to make enough to feed an army, did I?
One of the best-kept secrets in the preserving world is the joy of something we call “small-batch preserving.” Turning a pound of blueberries from your backyard into a pint of jam to be enjoyed in the middle of winter, long after your garden is tucked in for the winter.
Or try to make one or two quarts of pickles with the same idea in mind. You’ll be glad you did when you’re making a deli-style sandwich at home and realize a dill pickle would round out your plate perfectly.
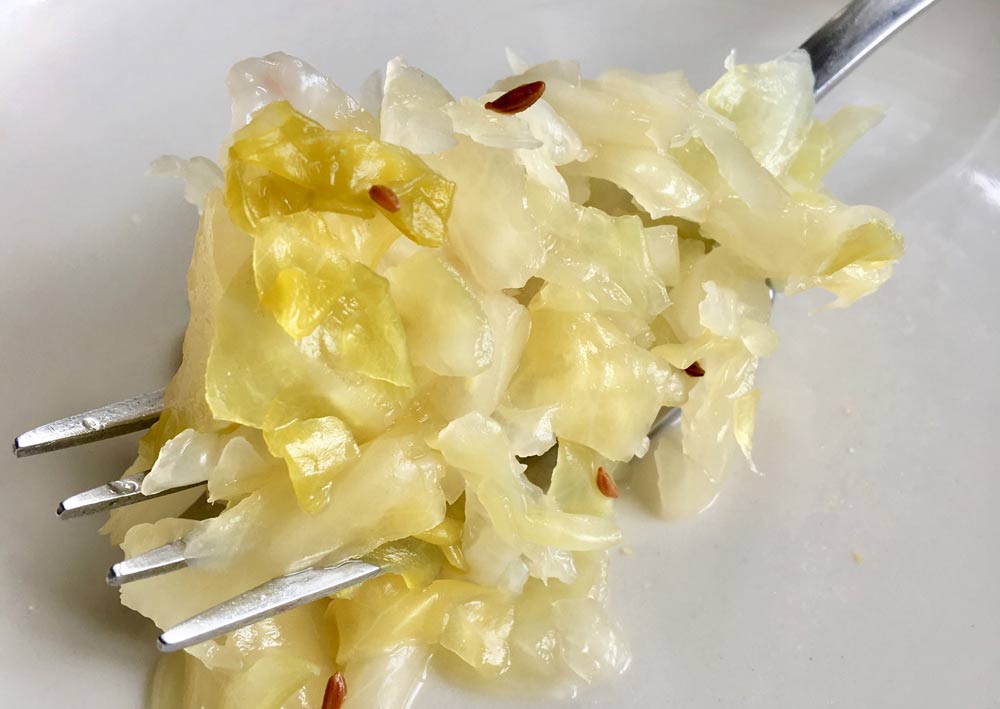
Cabbage grows well in the Northwest, which makes it perfect for preservation. Specifically, cabbage is great when fermented — better known as “sauerkraut..”
The growing realization in the health world that fermented foods are good for you inspires some people to try to make it themselves. Homemade sauerkraut is healthy — and delicious too.
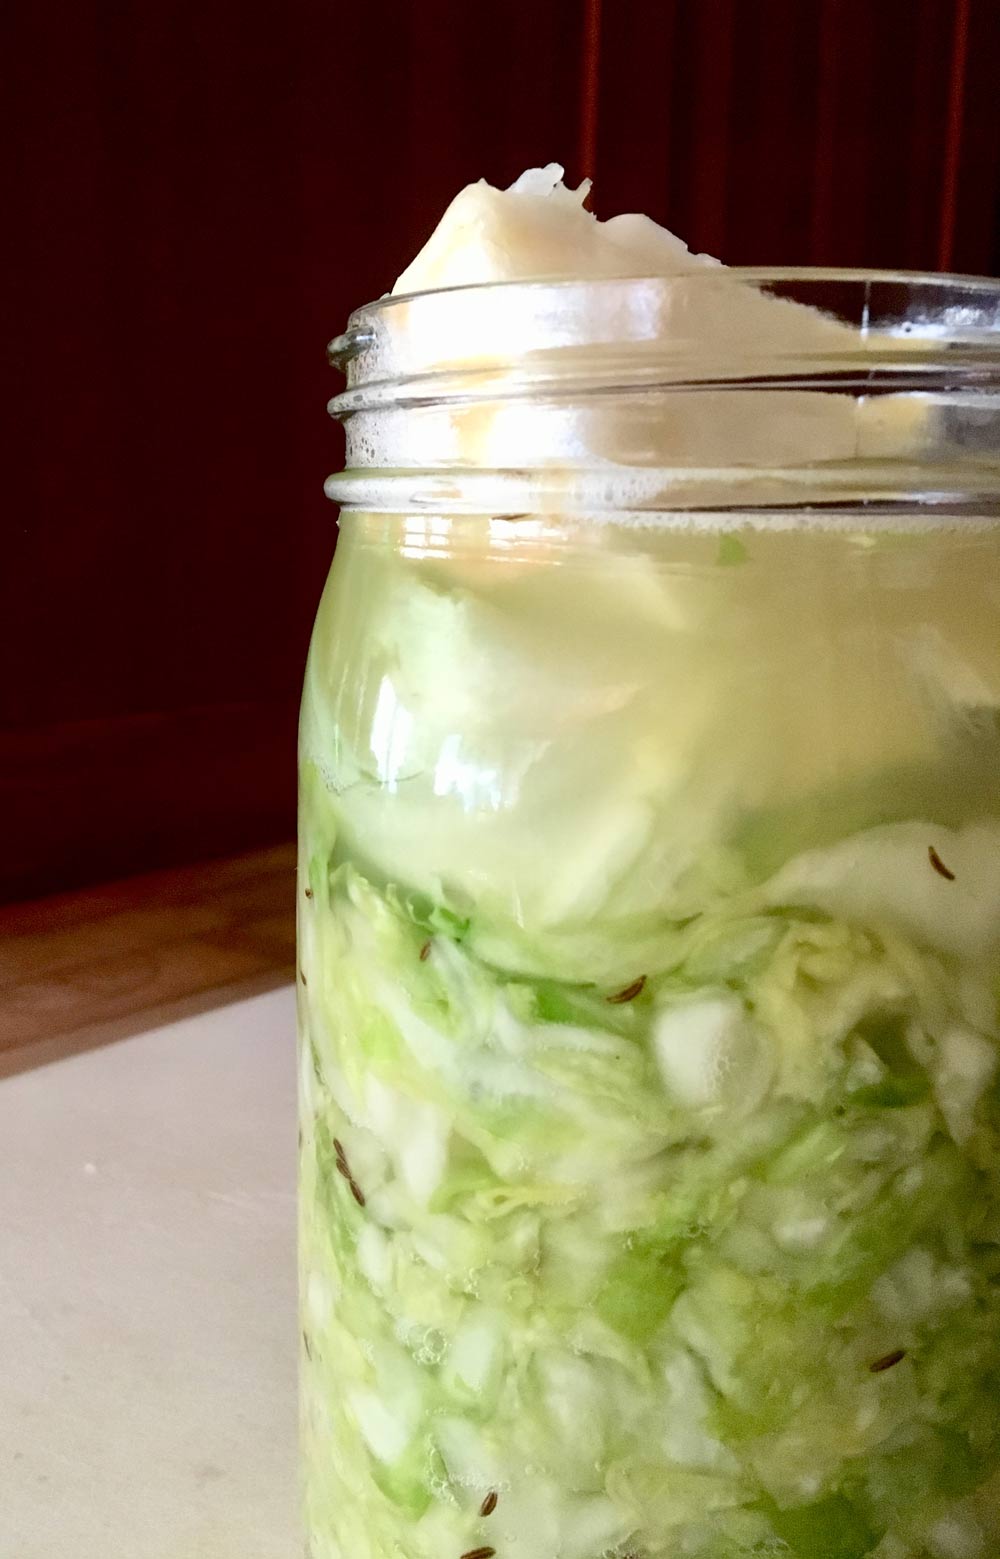
You can ferment small batches of sauerkraut on your kitchen counter — no crock required. In fact, I don’t recommend using crocks at all, unless it’s a relatively new one.
Some old crocks have lead in the glaze. I have heard that for about $15, you can buy a kit to test for the presence of lead, but I would rather be safe than sorry.
Before I knew about lead in pottery glaze, I used crocks. Now I only use them for decoration and stick to glass or food-grade plastic containers for fermenting.
Some people who love sauerkraut think that buying the commercially prepared kind from the shelf at the store is just as healthy as fermented sauerkraut, but it’s not. If it is shelf-stable, it has been processed to the point that the healthy part has been cooked right out of it.
I highly recommend some of the locally made sauerkrauts sold in jars in the refrigerated section. But you can make it right at home for a lot less money, and then choose to go organic if you prefer and can’t find that option at your local grocer.
The first time you make my recipe, follow the instructions as shown here. Over time, you might want to get more creative by adding a handful of grated carrots or thinly sliced green onions.
You can add spices, like caraway seeds or red chili pepper flakes. I always tell people to taste their mixture right before packing it in to jars. It should taste good, but a little on the salty side. Like a salty, crunchy cabbage salad!
Do an online search for the term “small batch preserving” and it will no doubt turn up countless recipes that will inspire you to embrace this concept. You can also check out a book written by my friend, Marisa McClellan, titled “Food in Jars: Preserving in Small Batches Year-Round.”
Making sauerkraut at home is simple. It only takes about a half hour, tops. You need one head of cabbage, 1 to 2 tablespoons of salt*, a cutting board and a sharp knife, a big bowl, two quart jars, and a desire to make the best sauerkraut you’ve ever had, because you made it with your own two hands.
It might take several days for it to ferment, but sometimes I don’t wait that long. I have been known to eat a few bites of it each day as it progressively gets more sour. Try it — you might just love it!
*For salt, use kosher salt or sea salt. Just don’t use Mortons “table” salt. It contains anticaking agents that you don’t want in your ferments or any other preserving.
Sauerkraut Is Not German
Dutch, Says Food Administration, Urging Patriots to Eat More of It
From the Washington Post, May 31, 1918
On account of its supposedly German name, sauerkraut seems to be losing its popularity as an American dish. The food administration has learned that throughout the country men and women in their patriotic zeal have been spreading a strong propaganda to discourage the use of a valuable foodstuff.
As a matter of fact the dish is Dutch rather than of German origin. Its wider use would stimulate a greater use of cabbage and would further the food administration’s campaign for increased consumption of perishable foodstuffs and a greater saving of the staple foods needed abroad. Sauerkraut is a valuable food, and its use should not be curtailed as a result of ill-advised patriotism.
Homemade Sauerkraut
Yield: 2 quarts
A simple recipe to make traditional, lacto-fermented, homemade sauerkraut using only cabbage, salt and time.
Ingredients:
- 1 medium cabbage head, about 4 to 5 pounds
- 1-2 tbsp kosher salt or sea salt
- Optional: Feel free to add a few caraway seeds if you’d like.
Instructions:
Peel one or two outer layers from the head of cabbage and set the leaves aside. Cut cabbage head into quarters. Cut out the core from each quarter and set core chunks aside.
Using a sharp knife, slice cabbage into thin shreds, about the thickness of a nickel, and place in a large mixing bowl.
Sprinkle salt over cabbage, then toss cabbage and salt together. Begin to squeeze the cabbage and salt together with your hands, kneading it thoroughly to break up the cellular structure of the shredded cabbage. Knead for at least 10 minutes.
When the cabbage has become limp and releases its juice, transfer it to two clean mason jars, packing the salted cabbage into as tightly as you can, eliminating air bubbles.
Continue packing the cabbage into the jars, leaving about 1 inch of headspace. The cabbage should now be completely submerged by the liquid given off by the mixture. Cover the mixture with a leaf of cabbage and press down. Now put a chunk of the core on top of the leaf, and make sure it extends above the lip of the jar a bit. Screw a lid onto the jar and as it closes, it should force the cabbage leaf under the liquid.
Allow jars to sit at room temperature, undisturbed, for a few days, opening the lid briefly every day to release pressure in jar.
Important: Place jars in a loaf pan or on a plate because the brine sometimes overflows out of the jar as the cabbage begins to ferment. Make sure to release the pressure once per day, or the jar might explode.
Test the sauerkraut every few days until it is done to your liking. Transfer to the refrigerator or other cold storage, where it should keep for at least six months and up to a year.
Note: If scum appears floating in the brine of your homemade sauerkraut, simply spoon it off. You won’t be able to remove it all, but spoon off what you can and don’t worry about.
The real key to preparing homemade sauerkraut, and any fermented food, is that the solid materials rest below the liquid. Fermentation is an anaerobic process and to expose your ferments to air increases the likelihood that they’ll become contaminated by stray microbes, yeasts and molds which is why keeping the vegetables submerged at all times is very important.
About The Author
 Brook Hurst Stephens lives in Longbranch, on the Key Peninsula, at a place once known as Far-A-Way. She and her husband have been restoring the property and structures for the past two years. During the restoration process, she is laying the groundwork for a flower farm, specializing in dahlias. When she isn’t working among the flowers she spends time pursuing other interests, including preserving foods — she’s a certified master food preserver — farming oysters, foraging from land and sea, and growing specialty produce in her greenhouse, like guavas and other citrus.


 Litter Free")


Comments