


Hoop houses are a simple tool to improve success with year-round vegetable gardening in the Pacific Northwest. Constructed of basic, inexpensive materials and with the potential for easy relocation, hoop houses are essentially mini-greenhouses that anyone can build and utilize. And like a greenhouse, a hoop house provides a protective, warmer environment for plants that allows a gardener to get a jump on gardening in spring and extend the harvest later into fall.
Hoop houses protect plants from harsh weather such as frost, hail and strong winds that can physically damage plants, but also from rain and morning dew that can promote certain kinds of diseases. The temperatures inside a hoop house are higher than outside, a benefit for winter crops certainly, but also for warm-season crops, such as tomatoes and peppers, that prefer heat.
Crops can be covered and receive some protection from the elements by simply draping special cloth right over plants or with short hoops that form a low tunnel, but hoop houses are popular because they allow the gardener to get inside and work out of the rain.
There are many ways to build a hoop house and a quick online search reveals a multitude of helpful diagrams, videos and blogs. They can be small or large, simple or elaborate, and used for gardening at ground level or over raised beds. Visiting one of the local community gardens or taking a garden or farm tour can provide a glimpse into the different ways hoop houses can be built. The main considerations are a sturdy frame and thick, UV-resistant plastic to cover it — wind and snow can really do a number on a flimsy hoop house that is not well-anchored.
The following is a step-by-step guide on how to build a hoop house, courtesy of Kirstin Johnston, a Bremerton WSU Master Gardener with many gardening passions, one of which is edible gardening. She has devised an easy kit for an inexpensive, portable 5-by-8-feet hoop house that she sells to other gardeners.
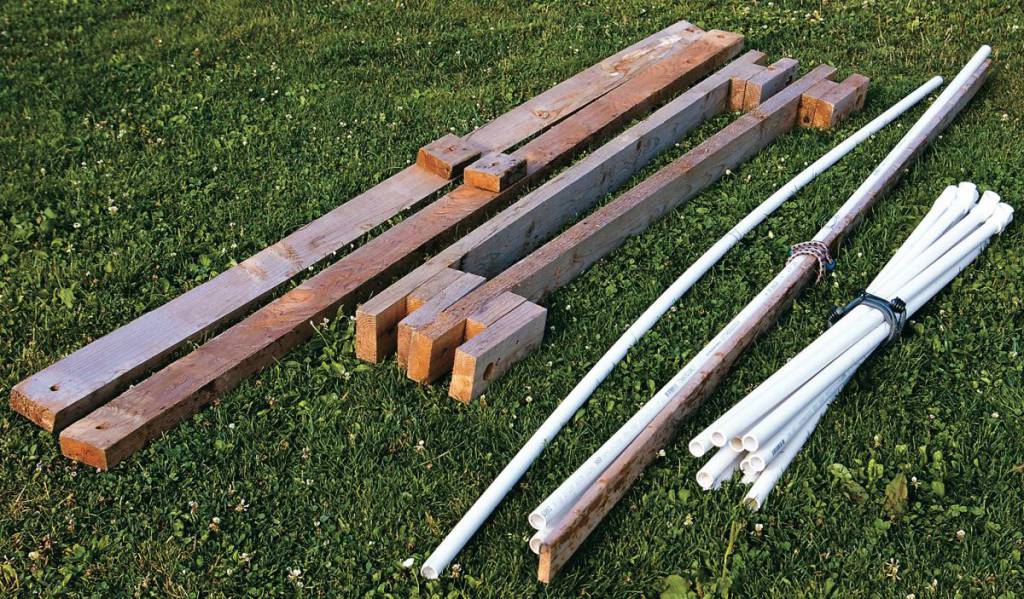
The kit includes numbered, precut and drilled lumber foundation boards, precut and numbered PVC pipe with connectors for the frame, and a heavy duty, UV-resistant plastic cut in the shapes needed for main cover and side “doors.” Over the years, Johnston has learned from building her own hoop house what size and materials work best. First and foremost, she cautions: “Do not use regular plastic! It disintegrates quickly, ripping and shredding into a million tiny pieces that litter the garden in as little as one year.” The UV-safe greenhouse film she recommends is guaranteed for four years and with care, even longer.

STEP ONE:
Prepare the Foundation Boards
The foundation of Johnston’s hoop house sits on the ground and can be moved around the garden as needed when rotating crops, and therefore requires somewhat level ground (a very gentle slope is OK). No digging is required to build it, other than to prepare the soil for planting as you would with any edible garden bed beforehand and then smooth out the surface.
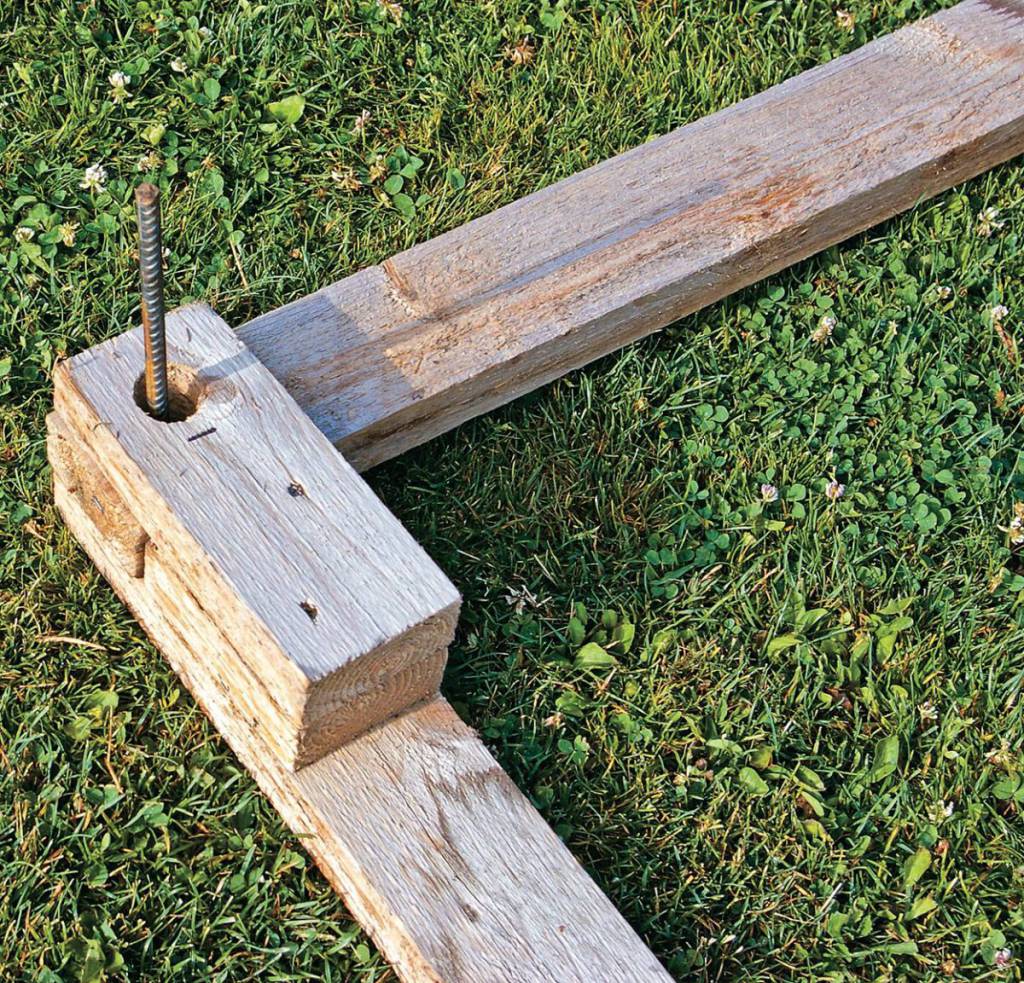
Johnston starts by cutting down two of the 8-foot cedar boards to 5-foot widths. She uses the cut remainders of those boards to stack on the ends of the 5-foot boards to connect the foundation corners. She drills holes through the foundation boards in the corners where they overlap. For the 8-foot lengths, she attaches a cut section of board in the center and drills through the sandwiched section.
Drill holes are wide enough to insert 3/8-inch rebar in the ends and middle of the 8-foot boards. The corner mounts screwed to the top of the 5-foot sections should have holes wide enough to insert not only the rebar, but the end of PVC pipes that make up the bottom of the frame.
STEP TWO:
Prepare the Frame Pipes
Johnston uses PVC pipe because it’s easy to cut with a hacksaw or handheld pipe cutter and can be bent by hand when installing to create the “hoops.” A frame created with metal pipe is more durable, but is more expensive, harder to cut, and requires a special bending tool. Because she uses PVC, she limits the overall size of the hoop house to 5 by 8. Wider sizes of frame made with PVC are too flexible and not as durable under the weight of snow or force of wind. You can always make a hoop house longer or put two in a row, Johnston says.
She then cuts the pipe into 10 lengths of about 46 inches each to use vertically and horizontally for the frame walls. The exact length doesn’t matter as long as they are uniform and the overall length of the walls including the connectors is no more than 8 feet. Three 8-foot sections will be used to create the “hoops” across the top.
STEP THREE:
Prepare the Overhead, Center Frame Board
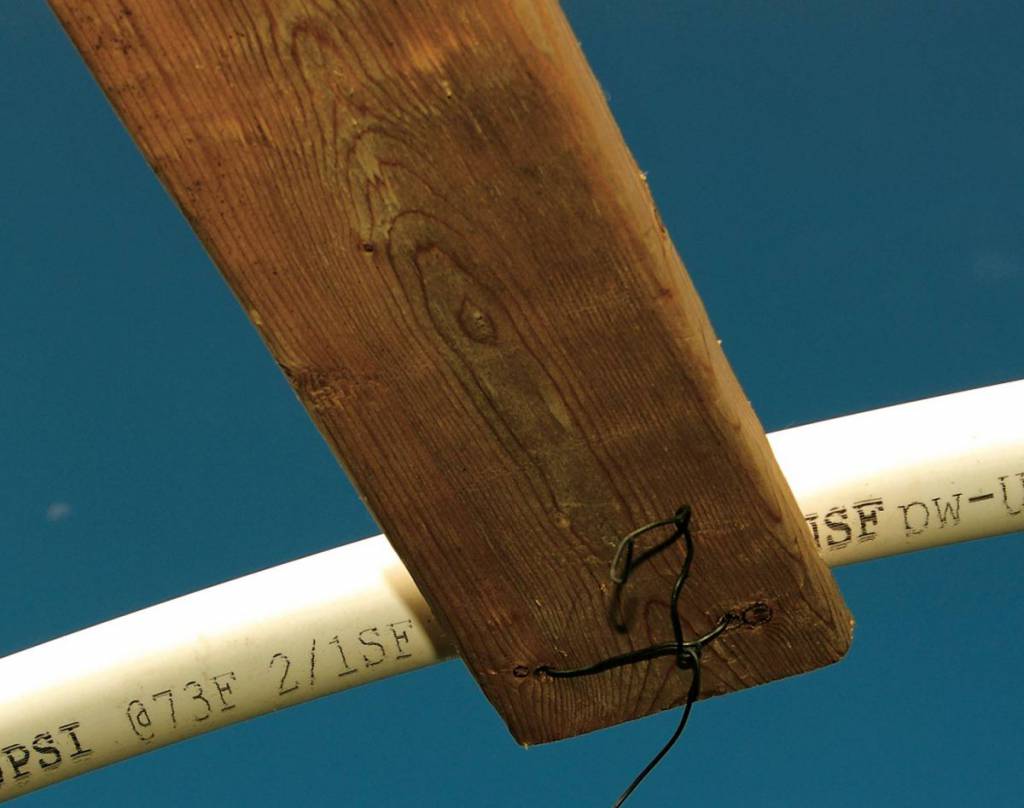
Johnston drills two small holes in each end of the 2-by-1/2-inch center board so that it can be wired to the PVC frame hoops at each end and in the center. Small holes are less likely to cause cracking in the relatively thin board that is used to add support to the spine of the overall frame. The stronger spine is nice to tie plants up to when they need support or to hang a small pot from to utilize the space inside better.
STEP FOUR:
Cut the Plastic into Main Section and Two End Sections
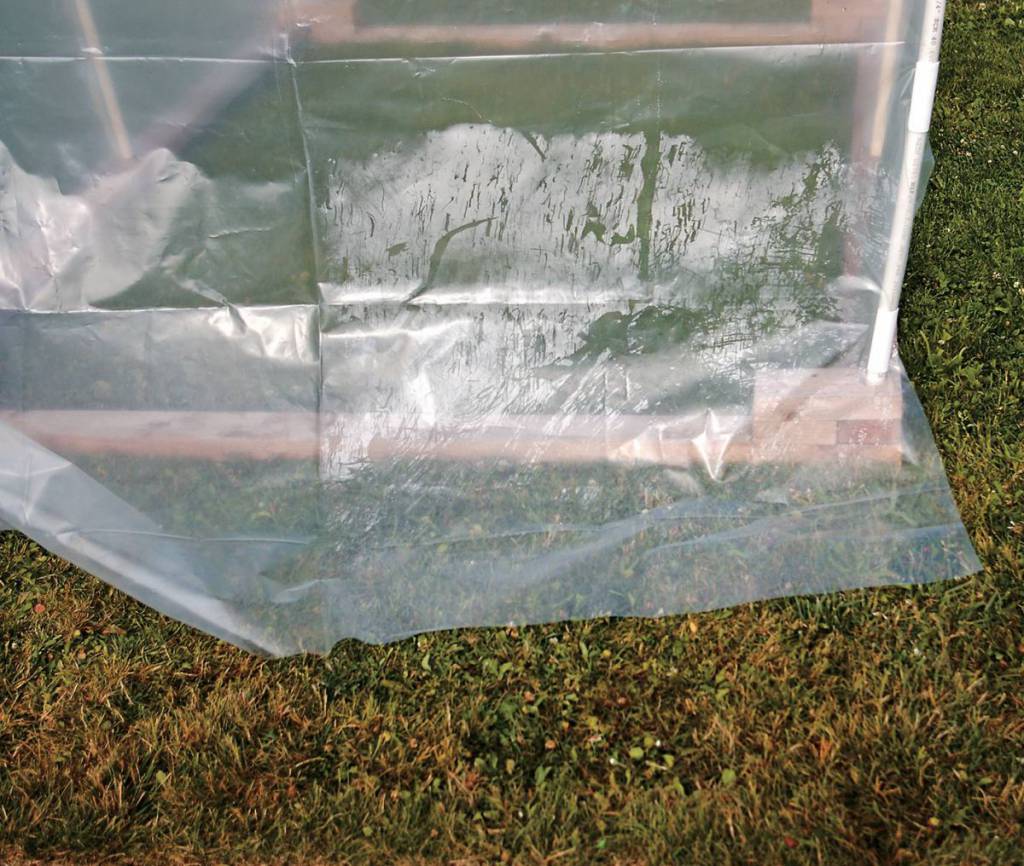
A 16-by-8-sheet of greenhouse film is needed for the main section. Each side of the walls will have an extra 18 inches at the bottom to weigh down or bury in the ground for the option to completely seal the bottom from the weather or open for ventilation as needed.
For each end section, cut a piece of the plastic to 5 feet by 8 feet. For the top curve of the end sections, you may want to attach the pieces to the constructed frame first before cutting the top curve that corresponds to the angle of the hoops. As with the main section, this size allows an extra 18 inches on the bottom for tucking/weighing.
Have plastic tape on hand to repair any small tears or punctures immediately so that wind does not make them worse; this will ensure that your plastic lasts as long as it can. Johnston says that once even the relatively heavy duty 6mm film is pulled taut, it’s easy to puncture accidentally with a tomato stake or the like.

STEP FIVE:
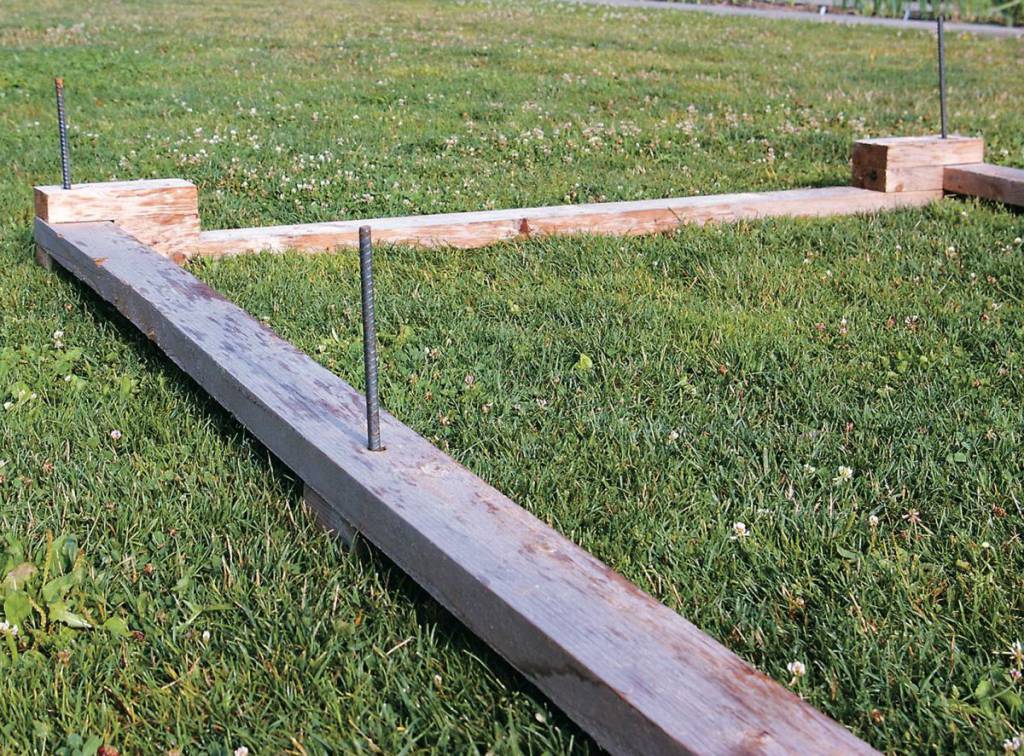
Construct the Foundation
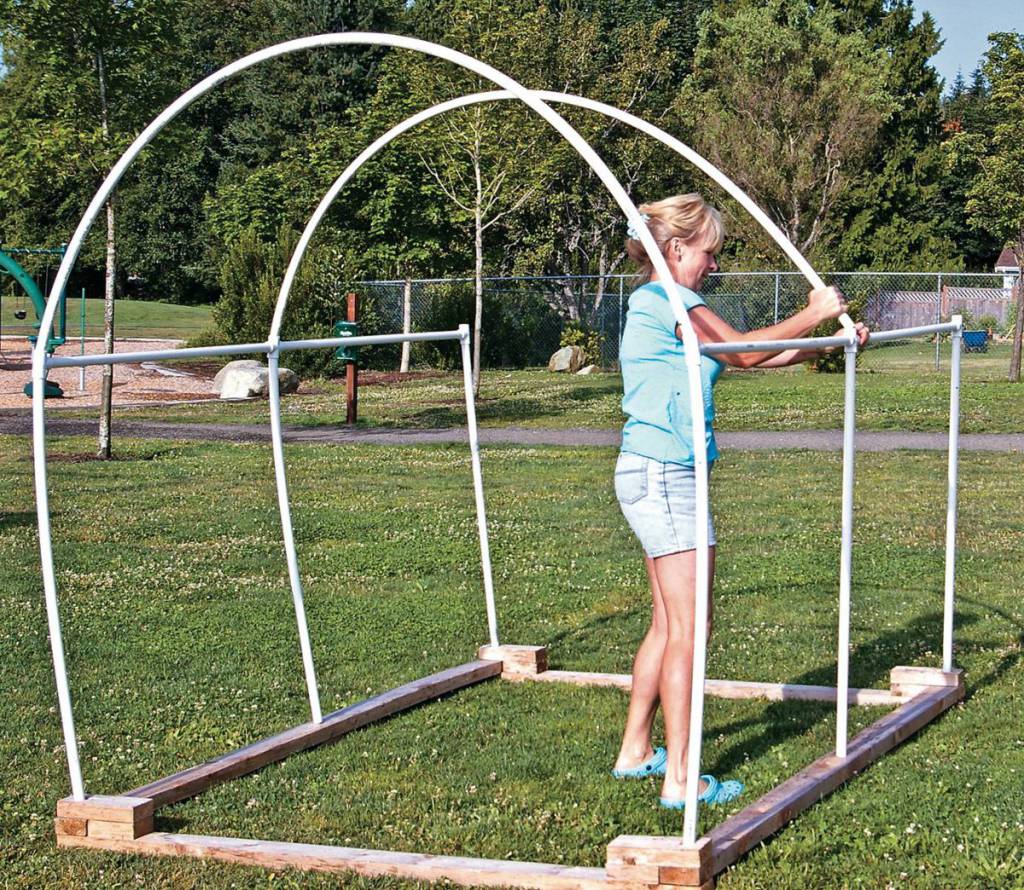
Once your foundation boards are cut, drilled and screwed together, construction is as easy as laying the boards out, connecting and securing the foundation to the ground by hammering the sections of rebar through the holes and into the ground. The rebar should stick out approximately 6 feet above the foundation, as the vertical pieces of PVC frame wall will slip over the rebar and secure it to the foundation.
STEP SIX:
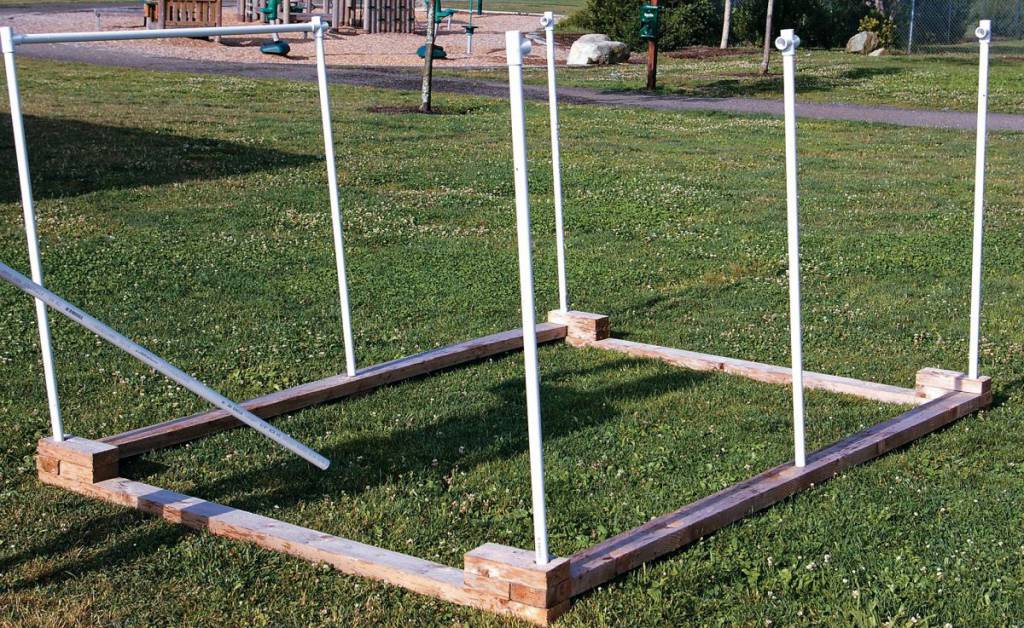
Build the Frame Walls
Don’t forget that the PVC pipe sections that make up the corners of the frame wall slide over the exposed rebar, but also through a section of board for extra support. The two pipes that make up the centers of the frame wall slide over the rebar and sit on top of the 8-foot boards.
Place a tee coupler on the top of each corner pipe and a cross-coupler on the top of each of the two center pipes. Finish the frame walls by adding the two horizontal lengths of pipe with the couplers.
STEP SEVEN:
Attach the Hoops and Spine of Frame
Place the end of the pipe in the coupler on one side of the frame wall and gently bend to insert other end into the opposite side. Do the same with the center hoop and final end hoop. Using a piece of wire, secure the board that will make up the spine of the frame to the center of the middle hoop and then wire to each of the end hoops. Tie the wire off cleanly underneath the board to avoid puncturing greenhouse film.
STEP EIGHT:
Attach the Greenhouse Film
The plastic is clipped to the ends of the pipe frame using removable PVC clips made especially for hoop houses. These can be made at home inexpensively by simply cutting PVC pipe into 2- to 3-inch sections and splitting lengthwise.
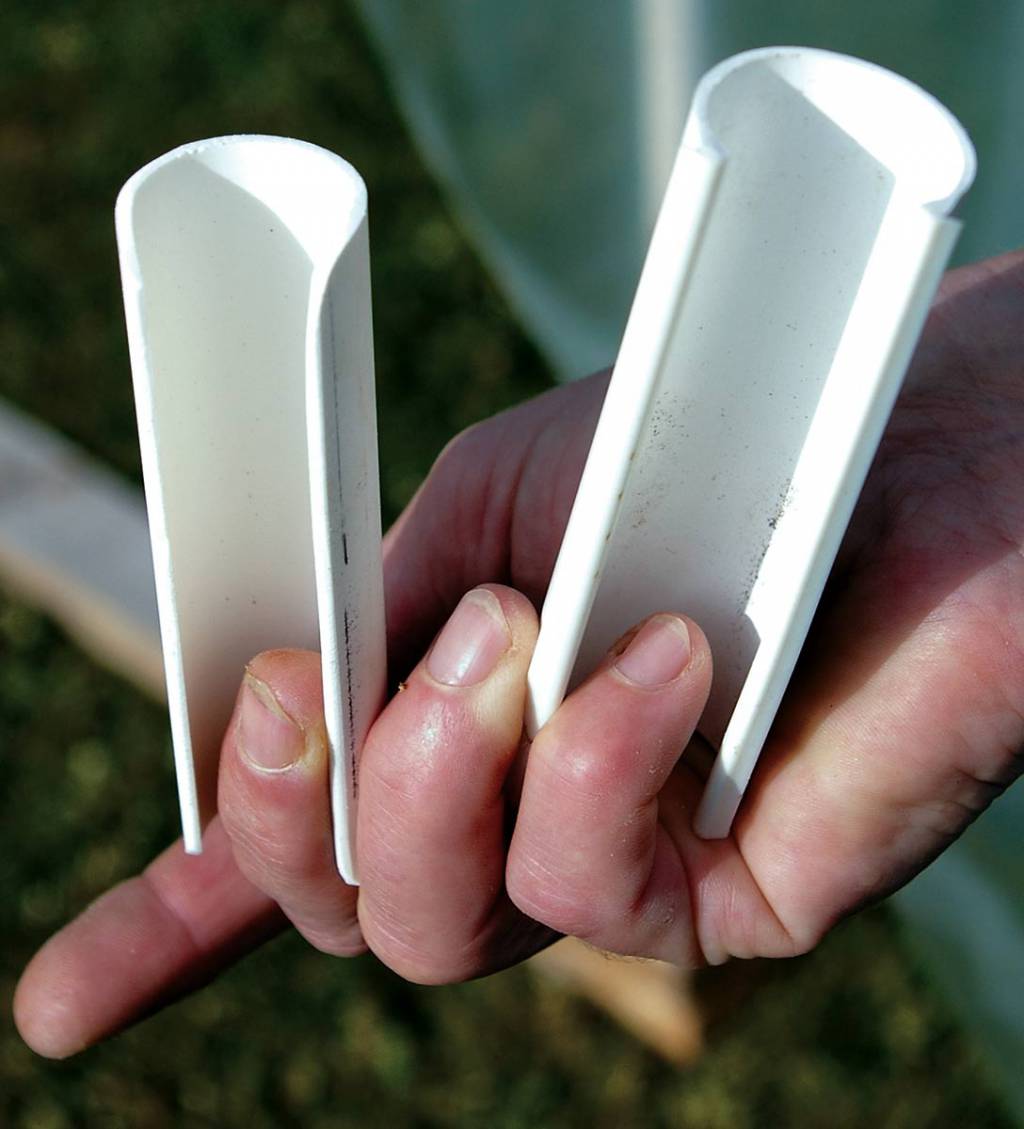
Commercially made hoop house clips have the advantage of being easier to remove than the homemade ones because of a tiny lip along the edge. Some gardeners get creative and re-purpose other types of clips.
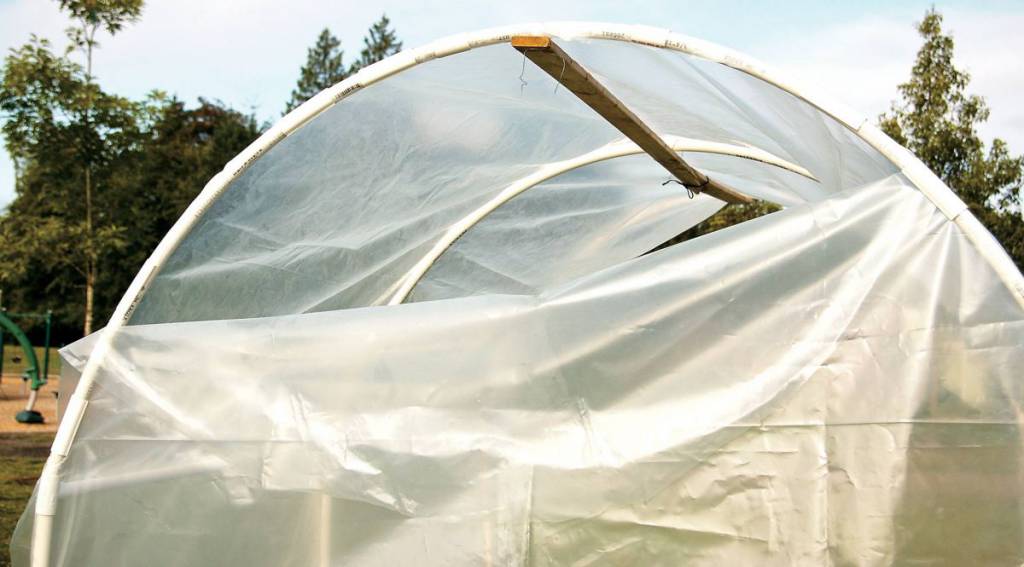
Lift the plastic over the top of the spine so that the 8-foot side of the plastic corresponds with the 8-foot length of the hoop house. Pull so that the plastic evenly puddles on both sides of the bottom of the walls and start clipping. Adjust the tension of the film as you go, adding clips or reclipping as needed to make the plastic taut. Once the main part of the frame is covered, attach the plastic for each end.
Johnston makes her own clips and uses those to attach the film to the main part of the frame and hoops. She purchases some to use for adhering the ends where she’s more likely to remove them to get in and out or to open for ventilation. Another tip: Shorter clips are easier when attaching the film to the curved hoop sections of pipe.


 Litter Free")


Comments